How to Use a Pompom Maker: Easy-to-Follow Guide
Creating pom-poms is a fun and creative way to add a decorative touch to your craft projects. Whether you want to embellish a hat, decorate a gift, or make a garland, pom-poms are an excellent choice. Using a pompom maker is the easiest way to create neat, fluffy pom-poms consistently. In this detailed guide, I will walk you through everything you need to know about how to use a pompom maker, ensuring you can make perfect pom-poms every time.
Materials Needed
Before we get into the steps, let’s start by going over the materials you’ll need to begin your pom-pom making journey.
Essential Items
- Pompom Maker: These come in various sizes, often as part of a kit, allowing you to make pom-poms in different sizes.
- Yarn: Choose any type of yarn, but keep in mind that different thicknesses will give different results.
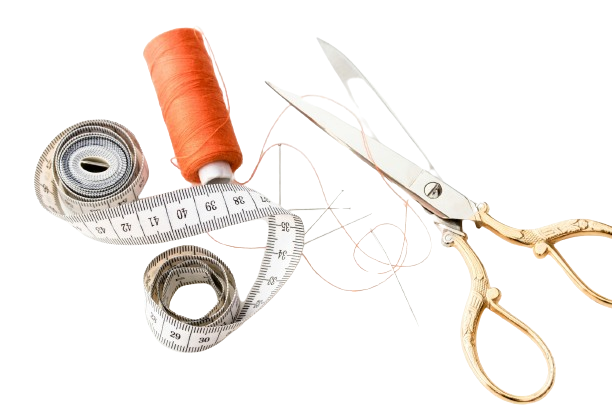
- Scissors: Sharp scissors are essential for trimming and shaping your pompom.
- String or Extra Yarn: This is used to tie the pompom in the center to hold it together.
Now that you’ve gathered your materials, let’s dive into how to use a pompom maker step by step.
Step 1: Assemble the Pompom Maker
Understanding the Pompom Maker
Your pompom maker will typically come in two parts that clip together. These halves create a circular shape when connected. This circle has two rounded arms that open and close, and there’s a gap in the middle. The pompom maker might feel a bit unfamiliar at first, but don’t worry—it’s very straightforward once you start.
Assemble the Tool
- Snap the Two Halves Together: Begin by snapping the two halves of the pompom maker together. Ensure that they form a full circle with the two arms closing over one another.
- Leave the Gap in the Center: Remember that the small gap in the middle will be crucial for the tying step, so be sure you can access it.
Once the pompom maker is assembled, you’re ready to start adding the yarn.
Step 2: Insert the Yarn
Prepare Your Yarn
Cut a long length of yarn from your yarn ball. Depending on how large or fluffy you want your pompom to be, you’ll use more or less yarn. If you’re using thicker yarn, you might need less to get a fuller look, while thinner yarn will require more.
Start Wrapping
- Secure the Yarn: Tie the yarn in a loose knot at the inner side of one of the arms of the pompom maker. This helps anchor the yarn as you start wrapping.
- Wrap the Yarn Around the Arms: Begin wrapping the yarn around both arms of the pompom maker. Be sure to wind evenly on both sides for a balanced pompom. The more wraps you make, the fluffier and denser your pompom will be.
The key here is to keep the tension even, not too tight, and not too loose.
Read Also: Crochet Curl Conundrum: Fixing Your Unruly Stitches
Step 3: Wind the Yarn
Wrapping for Fullness
Continue wrapping the yarn around the arms of the pompom maker until they are fully covered. Here’s a good rule of thumb:
- For Small Pom-poms: You may only need to wrap the yarn around 50-100 times, depending on the size.
- For Larger Pom-poms: Increase the number of wraps to 150-200 for a fuller result.
Be patient with this process. The goal is to make sure both halves of the pompom maker are equally covered with yarn. More wraps mean a fuller and fluffier pompom, so feel free to experiment with different thicknesses based on the look you want.
Step 4: Cut the Yarn
Preparing to Cut
Once you’re happy with how much yarn is wrapped around the pompom maker, it’s time to cut it. Carefully cut the yarn close to the pompom maker. Don’t worry if it’s not perfect—you’ll trim it later.
- Keep the Yarn Tight: Hold the yarn tightly in place as you cut to prevent it from slipping.
- Use Sharp Scissors: For the best results, use sharp scissors that will give you a clean cut.
This step ensures that your pompom stays neat and compact.
Step 5: Tie the Pompom
Secure the Pompom
Now that your yarn is wrapped, it’s time to tie it tightly around the center. This step is essential, as it holds your pompom together and ensures it won’t fall apart.
- Use a Strong String or Yarn: Take a separate piece of yarn or string and slide it into the gap between the two arms of the pompom maker.
- Tie a Tight Knot: Pull the string or yarn tightly and tie a firm knot around the center of the pompom. Make sure it’s secure. This knot will hold all of your yarn in place.
You can double knot for extra security.
Step 6: Remove the Pompom Maker
Releasing the Pompom
Once the yarn is securely tied, it’s time to carefully remove the pompom maker.
- Gently Open the Arms: Open the two rounded arms of the pompom maker and pull them away from the yarn.
- Pull the Two Halves Apart: Next, pull the two halves of the pompom maker apart. Your yarn pompom should now be free, held together by the tight knot you made earlier.
Be gentle during this step, as you don’t want to accidentally unravel the yarn.
Step 7: Trim and Shape
Final Touches
At this point, your pompom may look a little scruffy, but don’t worry! It just needs a little trimming and shaping.
- Trim the Edges: Use your sharp scissors to trim away any uneven strands. You can shape your pompom to be as neat and round as you like.
- Fluff the Pompom: Fluff up your pompom by rolling it between your hands. This helps the yarn puff out and gives your pompom that classic fluffy look.
If needed, give your pompom a final snip to ensure all strands are uniform.

Hydrangea Balls Silk Pom Pom Pomander Flower Floral Balls
Tips for Using a Pompom Maker
Now that you know the basic steps, here are some extra tips to help you make the perfect pom-poms every time.
Experiment with Yarn
Different types of yarn will create different effects. Here’s how you can switch things up:
- Chunky Yarn: Using chunky yarn will result in a larger, fluffier pompom with more volume.
- Fine Yarn: Thinner yarn creates a smaller, denser pompom with a more compact feel.
Try mixing different yarns for a unique, textured look!
Adjust the Size
The number of wraps you make will affect the size of your pompom. More wraps mean a bigger, fluffier pompom, while fewer wraps will give you a smaller pompom.
- For Tiny Pom-poms: Wrap fewer times and use thinner yarn.
- For Giant Pom-poms: Wrap more and use thicker yarn.
Use a Multi-Size Pompom Maker
Many pompom makers come in sets with different sizes. This is great if you want to make a variety of pom-poms for different projects.
- Mix Sizes: You can combine different sizes in a single project, like using smaller pom-poms for trim or larger ones as focal points.
Read Also: What is Bobble Stitch?
Conclusion
Using a pompom maker is an easy and satisfying way to make professional-looking pom-poms for all kinds of creative projects. Whether you’re decorating a scarf, making home decor, or adding a playful touch to a gift, pom-poms are a fun and versatile addition. By following the steps in this guide, you’ll be well on your way to creating fluffy, beautiful pom-poms that will impress everyone. Just remember to experiment with different yarns, sizes, and wraps to get the perfect look for your project.


